Add the Zoom Browser Extension to Google Chrome
Steps to add the Zoom browser extension to Google Chrome
This guide will first walk you through the steps of adding the Zoom conference extension to your Google Chrome browser. Once installed, you have the option to start or schedule your Zoom meeting with a single click from your browser or within Google calendar using your SJSU Id.
1. Go to https://zoom.us/download. Click on the link to Get Zoom Extension from Chrome
Web Store.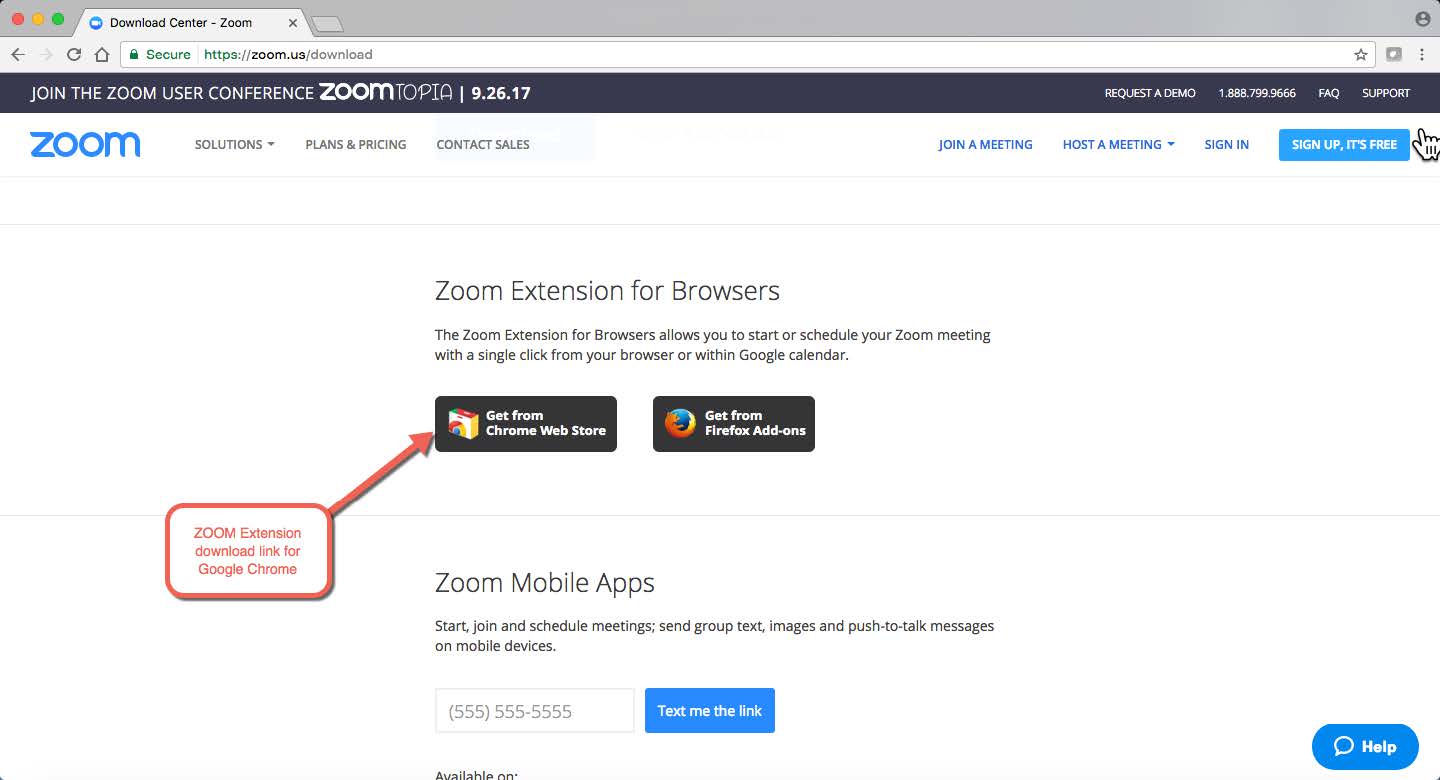
2. Click on “Add to Chrome” button in Chrome web Store to add the extension to Chrome.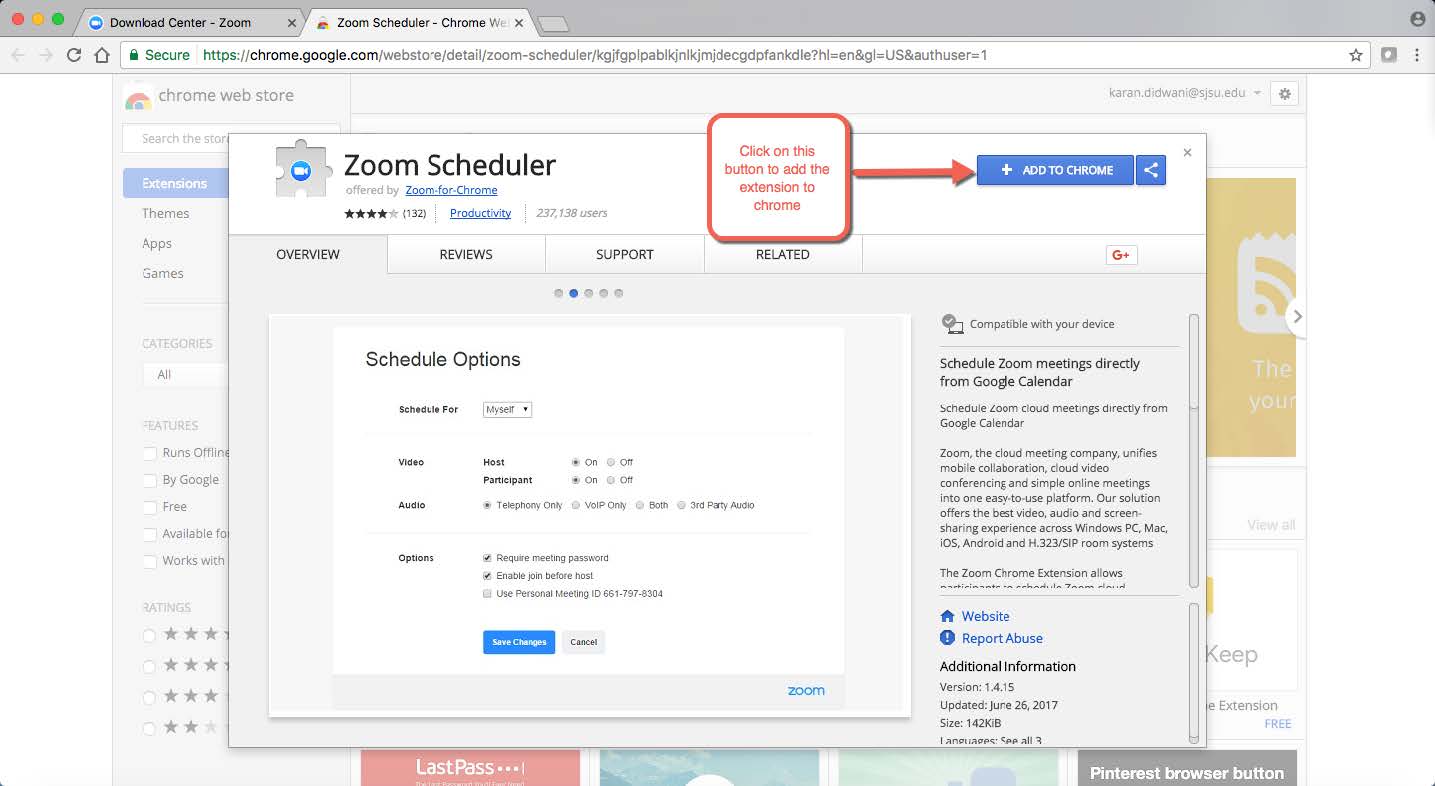
3. Next, confirm adding the extension on the browser pop-up by clicking the “add extension”
button.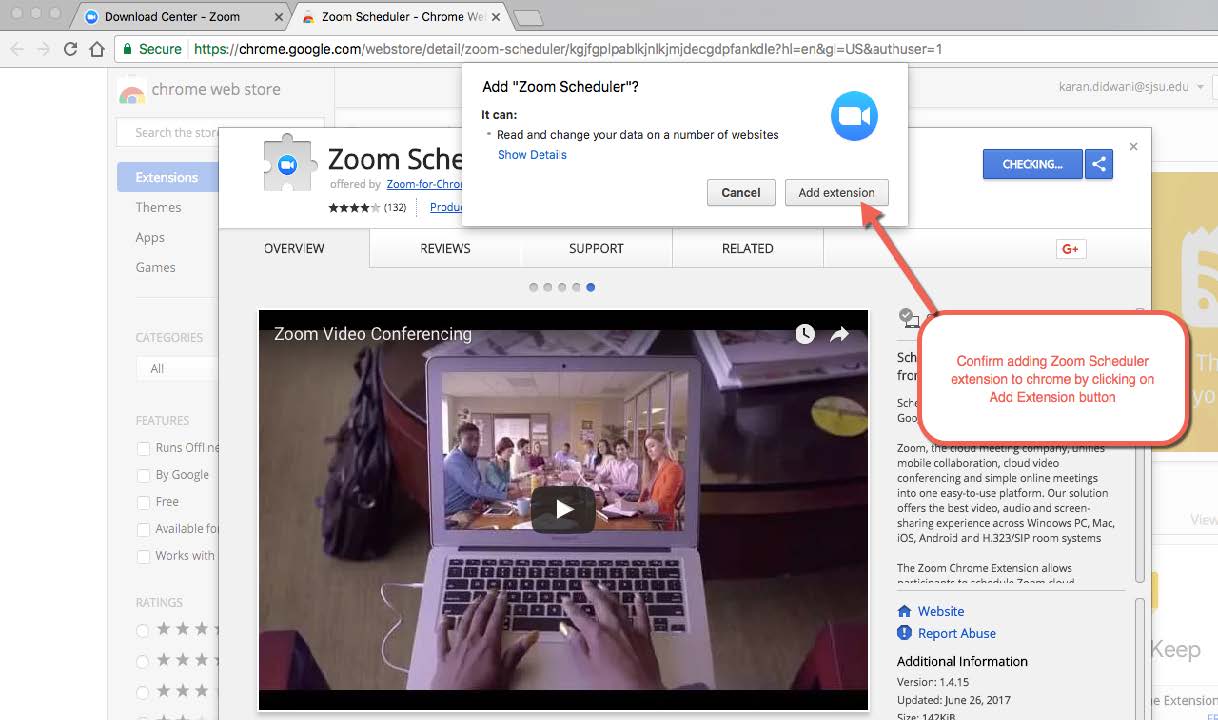
4. Once installed, the Zoom extension icon will appear to the right of the address
bar.
5. Once the Chrome extension is added, click on the Zoom icon to the right of the
address bar in Chrome. To sign in with your SJSU ID, click on “Sign In with Google”
Button.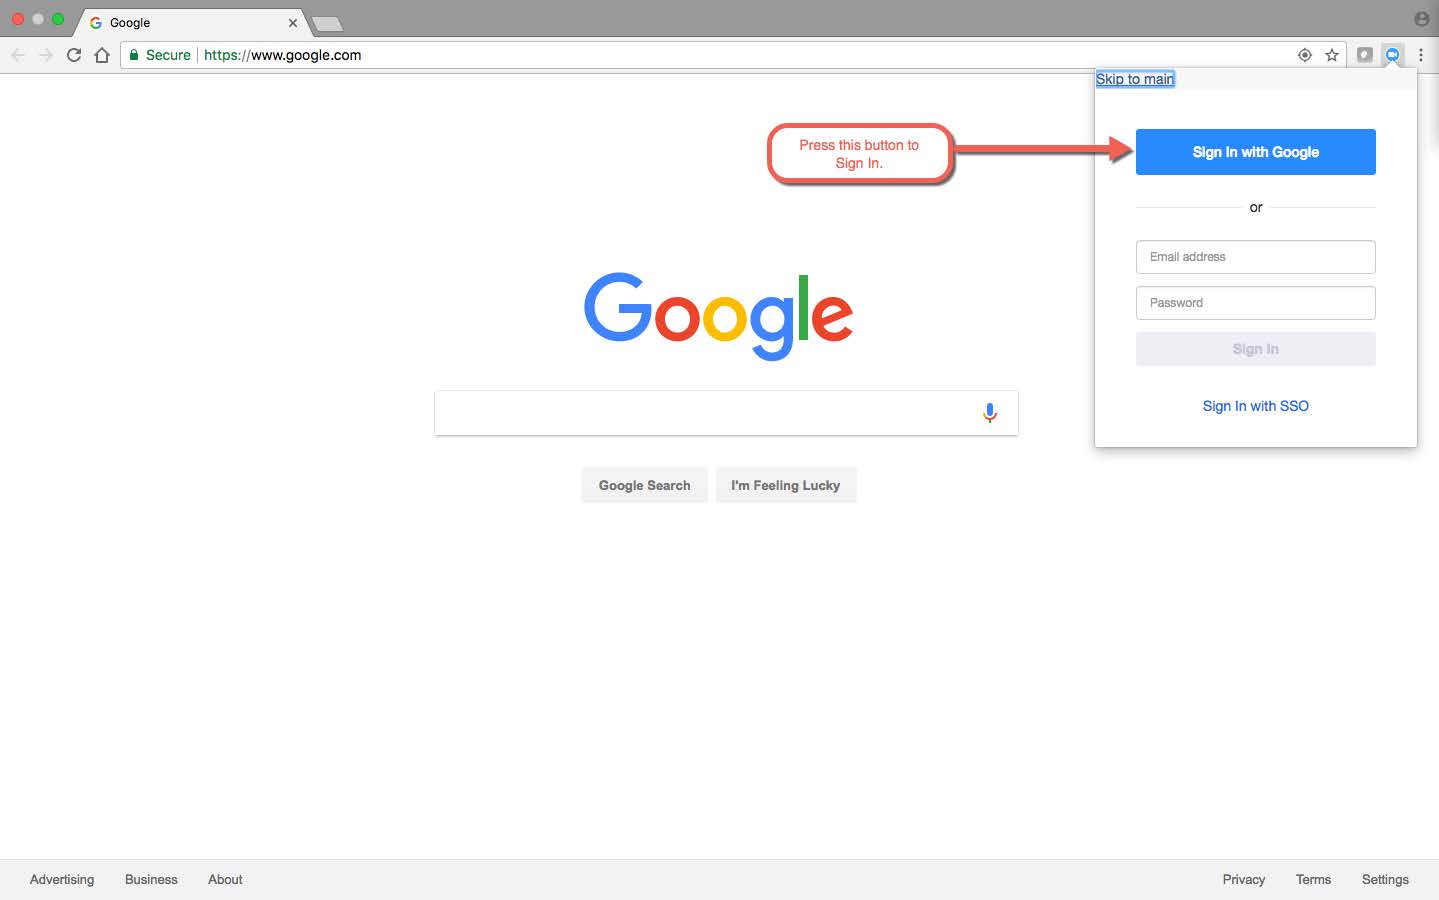
6. Enter your SJSU email Id and click on continue to sign in to your Zoom Account.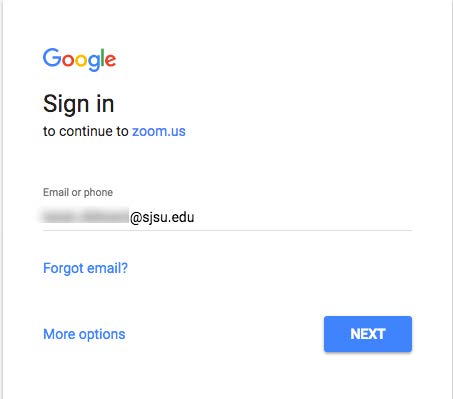
7. This will redirect you to the SJSU Login Page. Next, log in with your SJSU ID and
Password to access your Zoom account.